As promised I am posting my session from the 2018 AHA Conference. If you weren’t able to make it to Homebrew Con here is what I discussed.
Small batch brewing, the next big thing in home brewing. Could it be for you? Don’t let size and space restrictions prevent you from enjoying the hobby.
Reasons for going small…
- Small space, big cities have a growing number of small apartments
- Maybe you want to brew more often while not having a ton of beer sitting around.
- Want to try experimental batches.
- Refine your technique.
- You’re the only person consuming the beer.
- Just want to keep the hobby simple.
- Get back to the basics.
- Want to start home brewing without a big commitment in equipment?
- You want to save a little time and money.
- Escape brewing outside, much nicer to brew inside when it’s freezing outside.
- Lifting during brewing is physically difficult.
- Life is getting in the way of brewing.
- You don’t need a reason, it’s just plain fun!
Equipment –
- Kettle. For one gallon batch a 12 quart is great and you may already have one. A kettle 2 to 2-1/2 times the batch size for BIAB. I use a 5 gallon kettle and it works great for 1 to 2.5 gallon batches and even an average gravity 3 gallon batch.
- Fermenter – For 1 gallon batches a 2 gallon bucket for primary and one gallon glass jug for secondary works great. 2 to 2-1/2 gallon you can use a 3-5 gallon carboy.
- Smaller siphon if using 1 gallon glass jugs/2 gallon buckets as fermenters. There is a short version of the Auto Siphon that works great.
- Small scale, you will be using small amounts of hops and dry yeast so chose a scale that measures in tenths of an ounce and grams.
- If you are doing all-grain brewing using a standard mash tun arrangement then choose one sized smaller to help retain heat such as a 12-16 quart rectangular cooler or a 2-3 gallon beverage cooler. A BIAB mesh bag can be used in place of a false bottom or manifold arrangement.
- Other items such as air locks, stoppers, hydrometers, tubing, cappers and caps etc are same as used for normal 5 gallon batches.
The brewing process –
The brewing process is basically the same whether you are brewing one gallon or 100 barrels. Extract, partial mash as well as all-grain can be done in small batches.
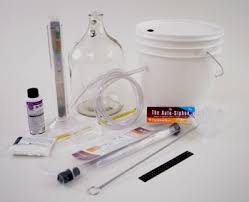
If you are completely new to home brewing there are many small batch equipment kits available from most of the major online home brewing retailers for 1 to 3 gallon batches. All contain the basic equipment you will need to begin brewing, some even have the kettle and beer bottles. This is where it is obvious that the industry has embraced the idea of small batch brewing, as little as 5 years ago there were few if any small batch equipment or ingredient kits available.
Already brewing? Most of your existing equipment can be used.
Small batch process considerations –
Volumes…
- Calculate boil off rate of your kettle! This will allow you to get the amount of wort in the fermenter you want. Don’t boil too vigorously, you are starting with a small volume to begin with, a nice rolling boil is fine. If you haven’t calculated your boil off rate before, fill the kettle you will be using for brewing with two gallons of water and bring it to a nice rolling boil and boil for an hour. Let it cool and measure how much is left. The difference between the beginning and ending amount is your approximate boil off rate. Use that for calculating your pre boil amount. Double check it for a couple brew days to get an accurate rate.
- Trub amounts will vary from beer to beer and when using different yeasts with different levels of attenuation but taking notes every once and awhile will give you a good idea. Err on the side of more than less, worst thing that will happen is you have an extra beer or two out of the
- Keep notes on how much beer goes to bottles/keg for a few batches so you know how much trub to account for. Trub amounts will vary from beer to beer and when using different yeasts with different levels of attenuation/floculation but taking notes every once and awhile will give you a good idea. Err on the side of more than less, worst thing that will happen is you have an extra beer or two.
- Recipe scaling. 2-1/2 gallon batch size is simple since you can just half everything in a 5 gallon recipe. One gallon batch you just divide ingredients in a 5 gallon recipe by 5. This will get you very close to what the original 5 gallon recipe was. Brewing software such as Beersmith will do the math for you.
- Double check your units of measure! Home brew shops use different scales so if your recipe calls for .4 pounds of a malt make sure their scale is set correctly. Couple ounce error can be significant in a small batch especially with darker roasted grains. Same goes for hops.
- Remember to scale down the yeast also, one can go really in depth in this area but generally speaking 2-3 grams of dry yeast per gallon is acceptable and will get you close to the recommended 1 million cells per milliliter of wort. For liquid yeast, I directly pitch a half packet of Wyeast per gallon and a whole pack for 2-3 gallon batches. White Labs recommends a whole vial for a 1 to 3 gallon batch especially for a big beer and a starter isn’t necessary and I have found that to work nicely. Having the chance to speak directly to the yeast companies about this at Homebrew Con was great and reassuring. Mr Malty’s Yeast Pitching calculator is also a great tool.
- Testing specific gravity – Typically home brewers have used a hydrometer to test original and final specific gravity to monitor mash efficiency, fermentation process etc. Problem is takes precious beer to do this. Simplest thing is to just skip taking readings and let the beer ferment for 14 days. Refractometer. Uses a much small smaller sample size. Drops instead of ounces.Testing the standard method usually wastes about the equivalent amount of a bottle worth since you do not return the beer sample to the fermenter to prevent infection. Well when brewing a one gallon batch that much wasted beer hurts.Not testing …well if you are a home brewer with any experience that may be hard to do as we want to know what’s happening with our beer. One solution is to use a refractometer, which can measure the specific gravity with only a couple drops of wort or beer. The only problem is a refractometer doesn’t really work correctly when alcohol is present in fermented beer. If you record the original gravity and then get a final gravity reading there are several online calculators to give you a fairly accurate indication of alcohol by volume of your finished beer. A refractometer can still indicate if there is a change in specific gravity to indicate whether or not there is still fermentation activity. If you get the same reading three days in a row then typically it has finished. Personally after brewing so many batches and knowing my practices yield a consistent mash efficiency I am comfortable with just taking an original gravity reading to confirm my practices and then let it ferment for 14 days for ales. Recipe software is fairly accurate in predicting final gravity and ABV. At this point in my home brewing I am a firm believer in relaxing, not worrying and having a home brew. My golf game also improved and was more fun when I stopped keeping score.
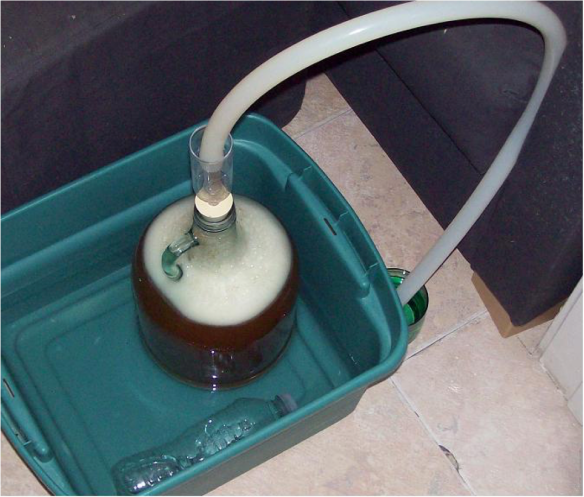
- Chilling your wort – With small batches it is easy to chill your wort to pitching temperatures by placing boil kettle in a cold water bath (kitchen sink) or ice bath. Small immersion wort chillers are available from several online retailers. My favorite is the compact immersion chiller from Coldbreak Brewing Equipment for $40. You can also make your own.
On to brewing…
Heating –
Stovetop or stand alone electric? Both are easy with smaller batches as less energy is required to bring 1-3 gallons to a boil. Stove top is the easiest and requires no special equipment. Where a stove top wasn’t a great option for 5+ gallon batches it works fine for small batches.
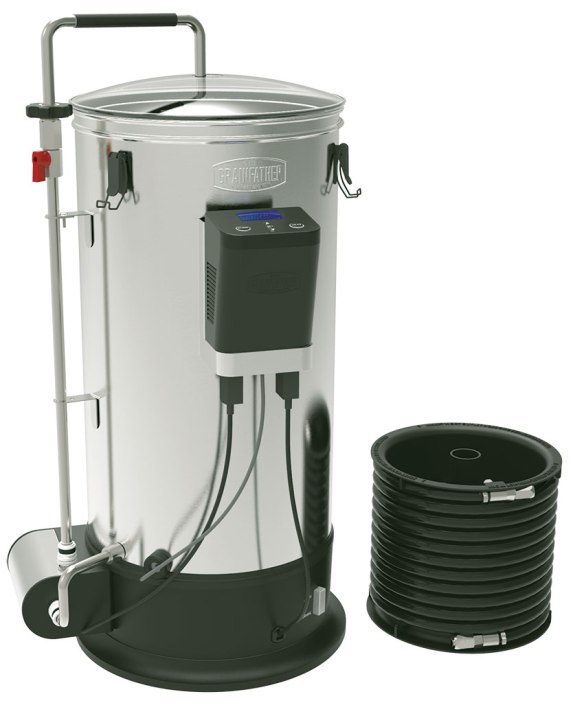
Electric systems – There are a few options for small batch stand alone electric BIAB systems including building your own.
Induction cooktops are a good option for small batches. 120V is great as it is capable of boiling small batches and is available in every home.
Brewing methods –
BIAB and traditional 3 vessel all-grain brewing methods are doable. BIAB being the easiest and requires the least amount of equipment and still you still get great results. All you need is a mesh bag and your kettle.
You can maintain mash temps during BIAB in a small kettle by covering the kettle with blanket or placing it in warm oven (150 degrees). Smaller vessels than usual for HLT, Mash Tun and Boil kettle. Small 3 gallon beverage cooler with BIAB bag or a small rectangular cooler with slotted manifold. Batch sparging also makes the process easier.
With a 3 vessel (HLT, Mash Tun and Boil Kettle) you will have to get creative but I have done the HLT on top of the fridge draining into the mash tun on the counter that drains into the boil kettle on a chair.
All-in-one systems –
All-in-one brewing appliances such as the Grainfather, Robobrew and the Mash and Boil have small batch capibilitues and don’t take up a ton of space, operate on 120V and can be stored in a closet when not in use.
Bottling or kegging –
Bottling is a whole a lot less work when you are only bottling about 9-10 12 oz bottles with a one gallon batch. Less space is needed to have multiple batches conditioning or aging. Carbonating drops make it even easier. Swing top bottles eliminate having to have a capper and caps.
Kegging…yes you can!
Kegging options –
Using stainless steel growlers and available CO2 dispensing options you can keg as little as a half gallon.
Tradition corny kegs are available as small as 1.75 gallons as well as 2.5 and 3 gallon sizes. Kegs that small can be kept in your normal refrigerator, eliminating the need for a separate kegerator and saving space.
Personally I like corny kegs since the connections are all standard in home brewing and parts are easy to source.
Below on the left is a sneak peek at something new for small batch brewers that want to keg and easily dispense. Check it out here http://www.taproom.club
One the right is my refrigerator with a 1.75 gallon keg.

Portable too!

New from taproom.club

Latest beer on tap, no kegerator needed
Now on to small space brewing!
Considerations –
Storage…
Biggest obstacle is storage! What can you do? Well here is what I have found to work.
Storage containers, nest smaller items in larger items, under-bed storage containers, top of closets, cabinet above the refrigerator.
An inexpensive new or used Armoire can provide attractive storage for all your brewing items that can fit in any decor.
Rolling kitchen island can do double duty, providing brewing storage as well as giving you additional kitchen work space and storage. I purchased a 24″ x 36″ stainless steel prep table that stores some of my brewing items and gives more counter space to brew, eat, prepare meals and work on my computer.
You can even store and hide your brewing gear in storage ottomans for your living room.
Collapsible items such as buckets and dish pans can be used for sanitizing, cleaning and don’t take up any space. These are available online through places such as Amazon.
A lot of my gear is in storage totes under my bed since I live in a tiny studio. In previous posts you may have see my brewing cart and made a nice cover for it. Use items that serve double duty such as your brew kettle can become a bottling bucket with a racking cane or if you have a drain valve installed.
Ventilation…
Ventilation is still important with small batches, especially in small spaces and if the room is cool. If you have a range hood that vents outside that would be more than adequate. If you don’t have a range hood but you have a window that opens in the kitchen or brewing space, a box fan can move a lot of air and accompanying humidity out of your space.
Fermentation space and temperature control…
- Use stick-on strip thermometers on your fermenters to monitor temps.
- Closets are a great space since they are dark, closed of from the rest of the home and do not have windows or heating/cooling vents so temperatures are more stable.
- A digital thermometer with min/max feature can tell you the average temps of an area you might be considering to ferment in.
- A small dorm/apartment refrigerator can become a temperature controlled fermentation chamber.
- A simpler solution is a basic water bath. Place your fermenter in a container of water and use frozen water bottles to keep it cool or an aquarium heater in the water bath to keep it warm if needed. Check temp often.
Pressure fermenting…
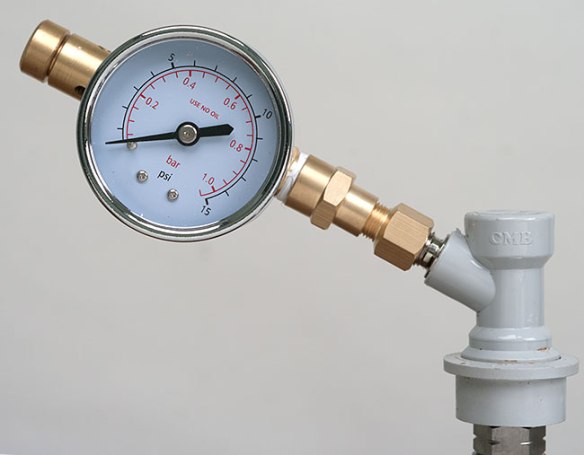
Fermenting under pressure. Pressure fermenting is gaining popularity as it allows for fermenting at a wide temperature range with less risk of having to worry about the production of off flavors such as fusel alcohol when fermenting too warm. Not a new practice but more people are trying it. A suitable pressure capable vessel is needed such as a corny keg. PicoBrew sells a replacement pressure relief for corny kegs that vents at a lower pressure to provide a safer fermentation process while using a corny keg. Or you can use a spunding valve. Ideally you want to ferment at pressures less than 14 psi. Above 14 psi yeast production can slow or stop and off flavors can begin to develop.
I have done several batches this way using a corny keg and spunding valve with no real temperature control and did not detect any off flavors. Kind of a poor man’s unitank.
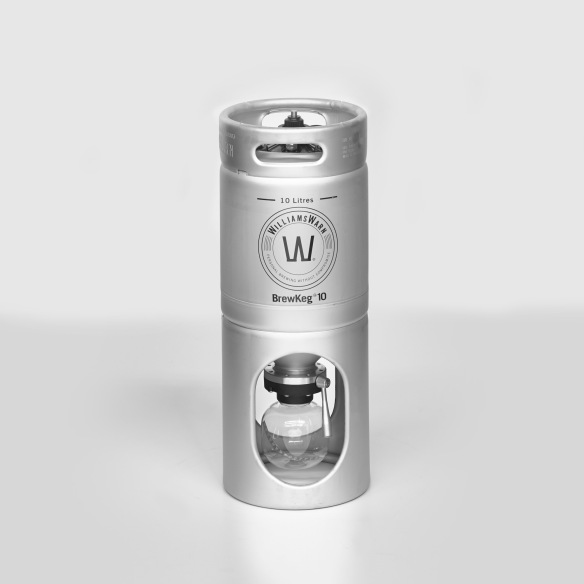
Williams Warn from down under has their Brewkeg10 that allows for pressure fermenting batches up to 2.6 gallons as well as yeast harvesting, trub removal and dispensing from the same vessel. It is available in the US and has standard ball lock connections. Another example of manufactures embracing the small batch brewing popularity.
This process will also carbonate your beer during the fermentation process.
Pros and cons of small batch brewing…
Pros –
- More and more home brew shops and online retailers are carrying small batch ingredient and equipment kits.
- There are even many purpose built pieces of small batch brewing equipment.
- Heating times to reach your strike water temperature and bringing the wort to a boil are shorter with a smaller quantity of liquid.
- Less/easier cleanup.
Cons –
Well you are making a smaller amount of beer so you may have to brew more. Wait, is that really a con?
So other than it taking almost as long to brew a one gallon batch as a ten gallon one there really isn’t a major downside to brewing on a small scale.
Well that was the presentation and I hoped I was able to give you some food for thought. Above all I hope you realize that wanting to go small isn’t a limitation but more of a method to making brewing work for you.
I will be posting more about the topic soon.
Cheers