Where did the time go?

Today someone asked for a link to my blog and I realized I haven’t posted here in long time. I apologize to those of you that follow me. Busy with work and this year…well it has changed almost everything we do. In home brewing we didn’t have a Homebrew Con this year, home brew club meetings were on Zoom, local taprooms closed for months, GABF was streamed online, curbside pickup at the local home brew shop, backyard socially distanced happy hours, PicoBrew went out of business. Hopefully next year we will be in a better place and be able to return to something resembling normal.

Even with everything going on I have managed to squeeze in some brewing and just started some modifications on my electric single vessel brewing system. Some exciting new home brewing equipment out there. Spike Brewing has introduced their single vessel electric systems and just released their 10 gallon small batch system. A Norwegian company called Brewtools has introduced an incredibly flexible single vessel, 40 quart, 120 volt electric system. Definitely worth checking out! Unlike many current single vessel electric systems out there it has replaceable parts, including the heating elements. Slightly expensive but awesome quality, it can do small batches as little as 3 gallons, has a small footprint for small brewing spaces and all tri clamp connections. Check them out at https://www.brewtools.us/

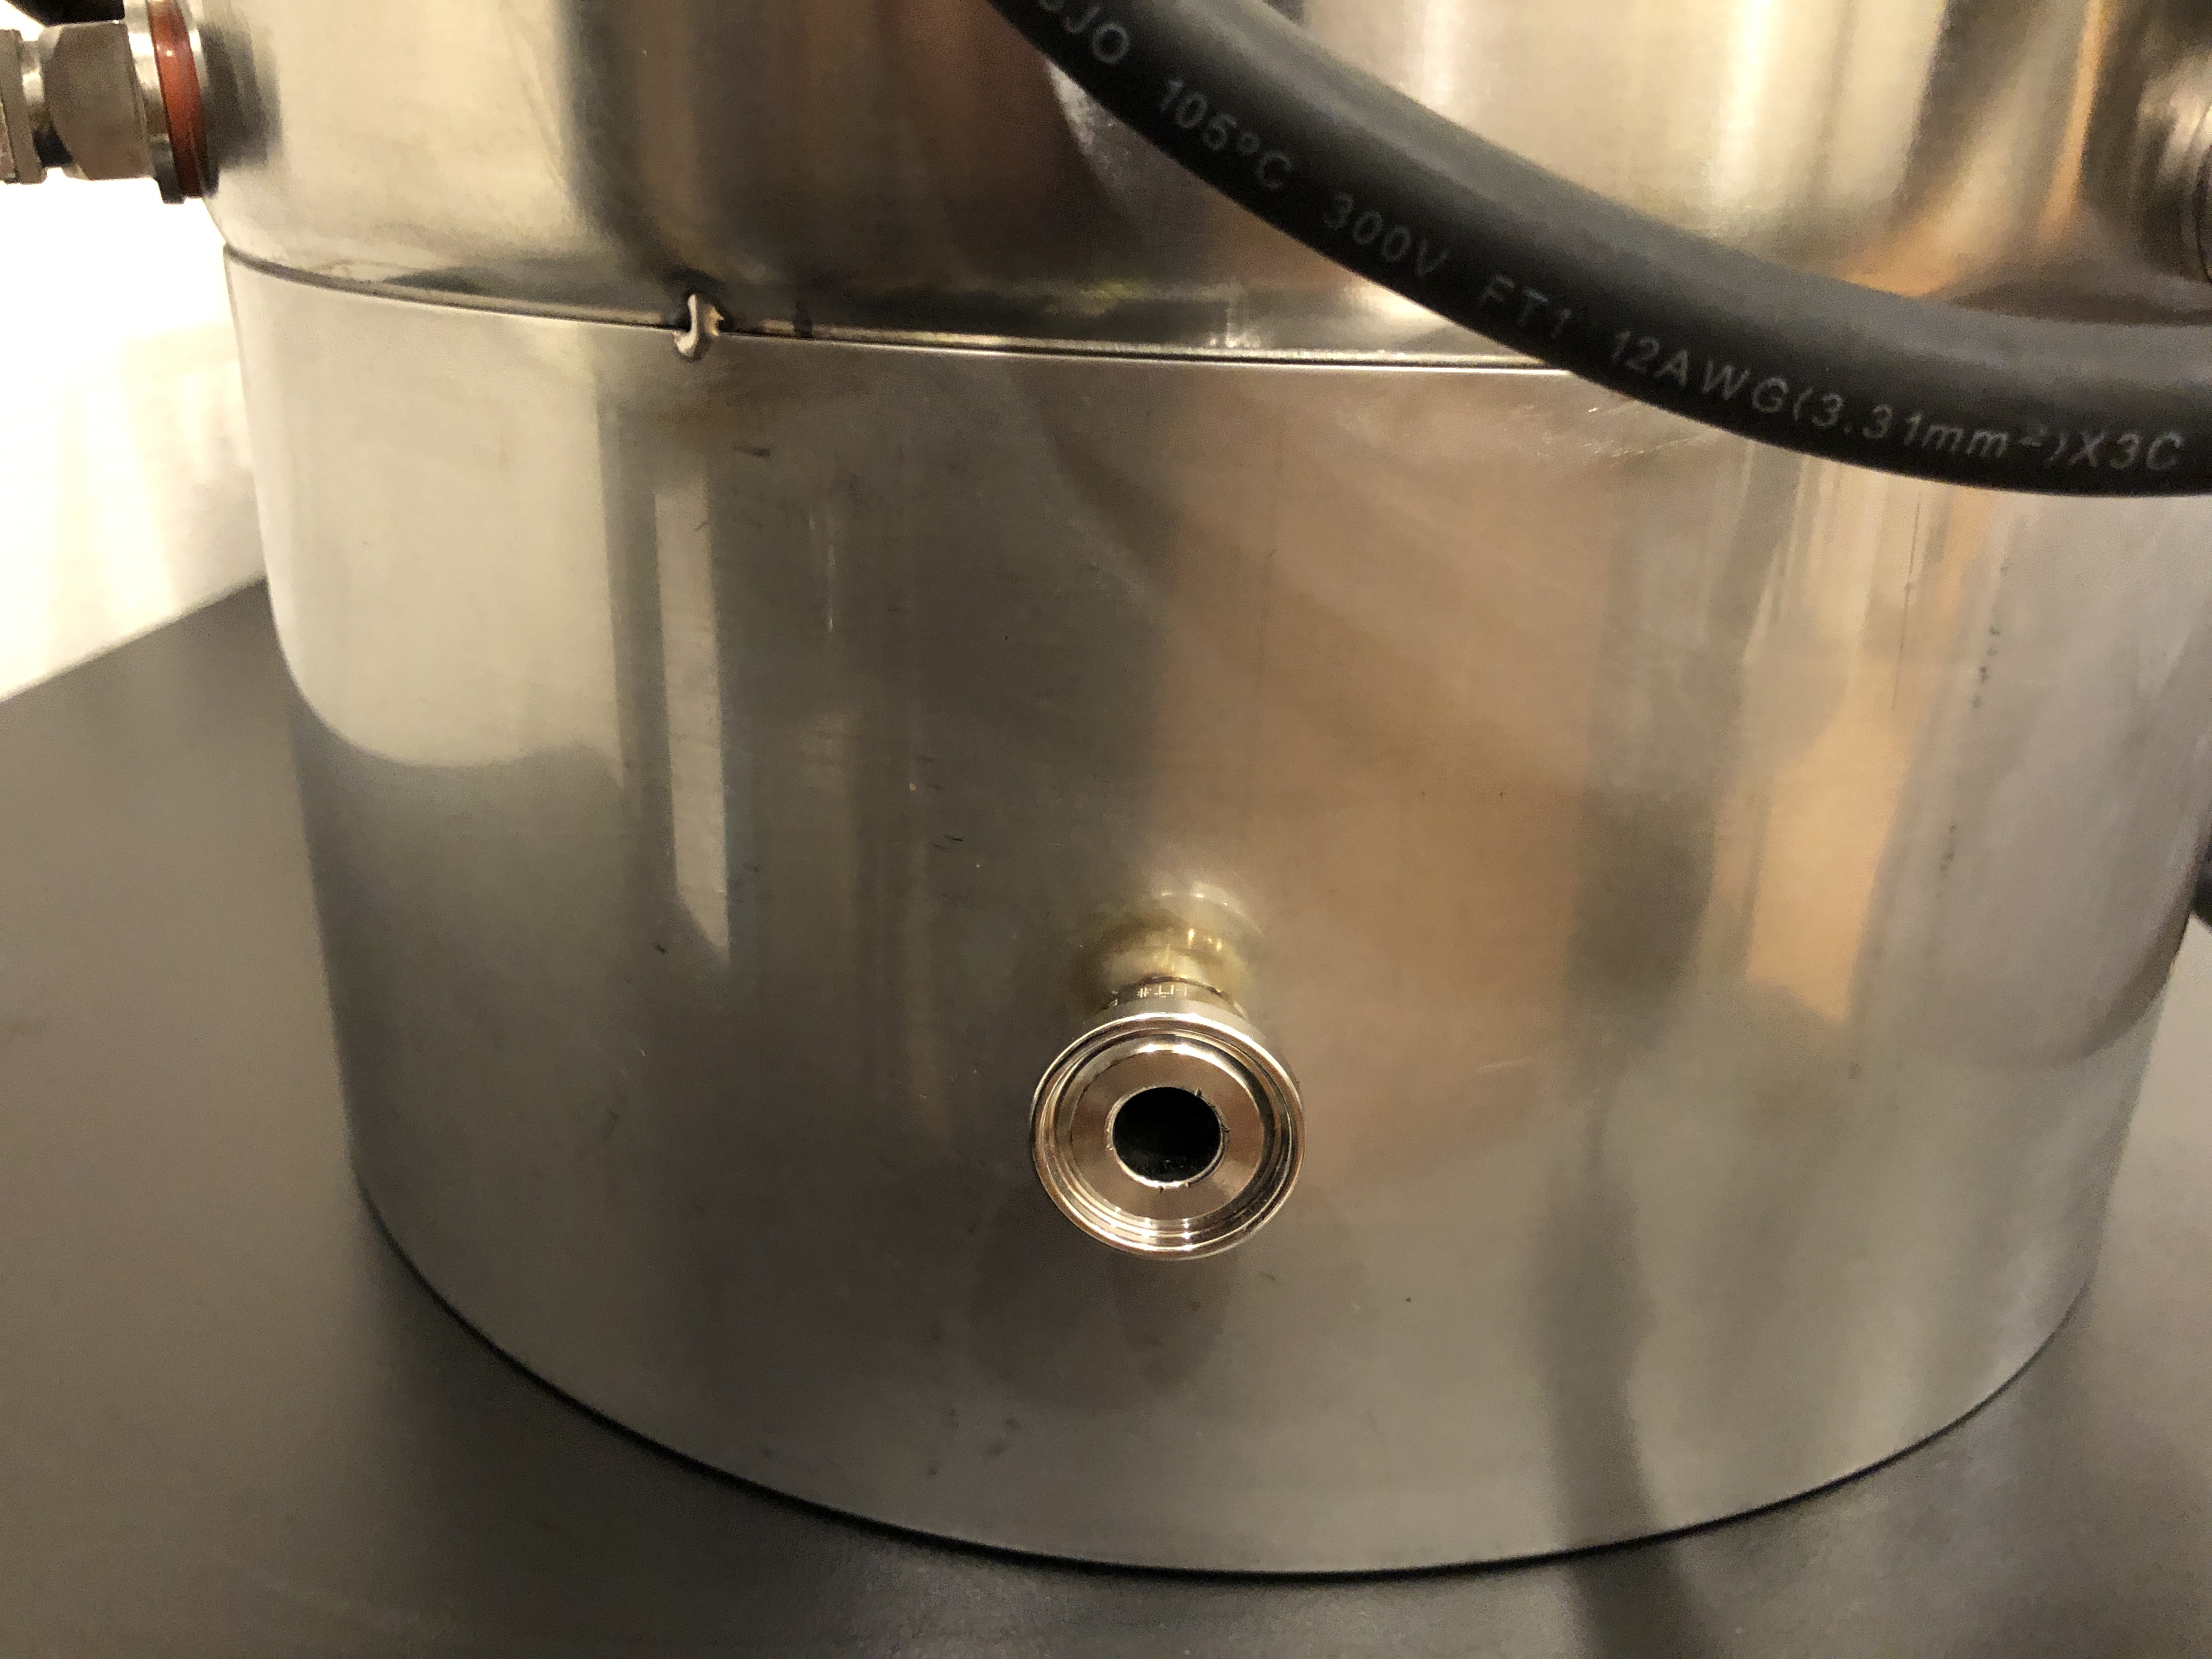
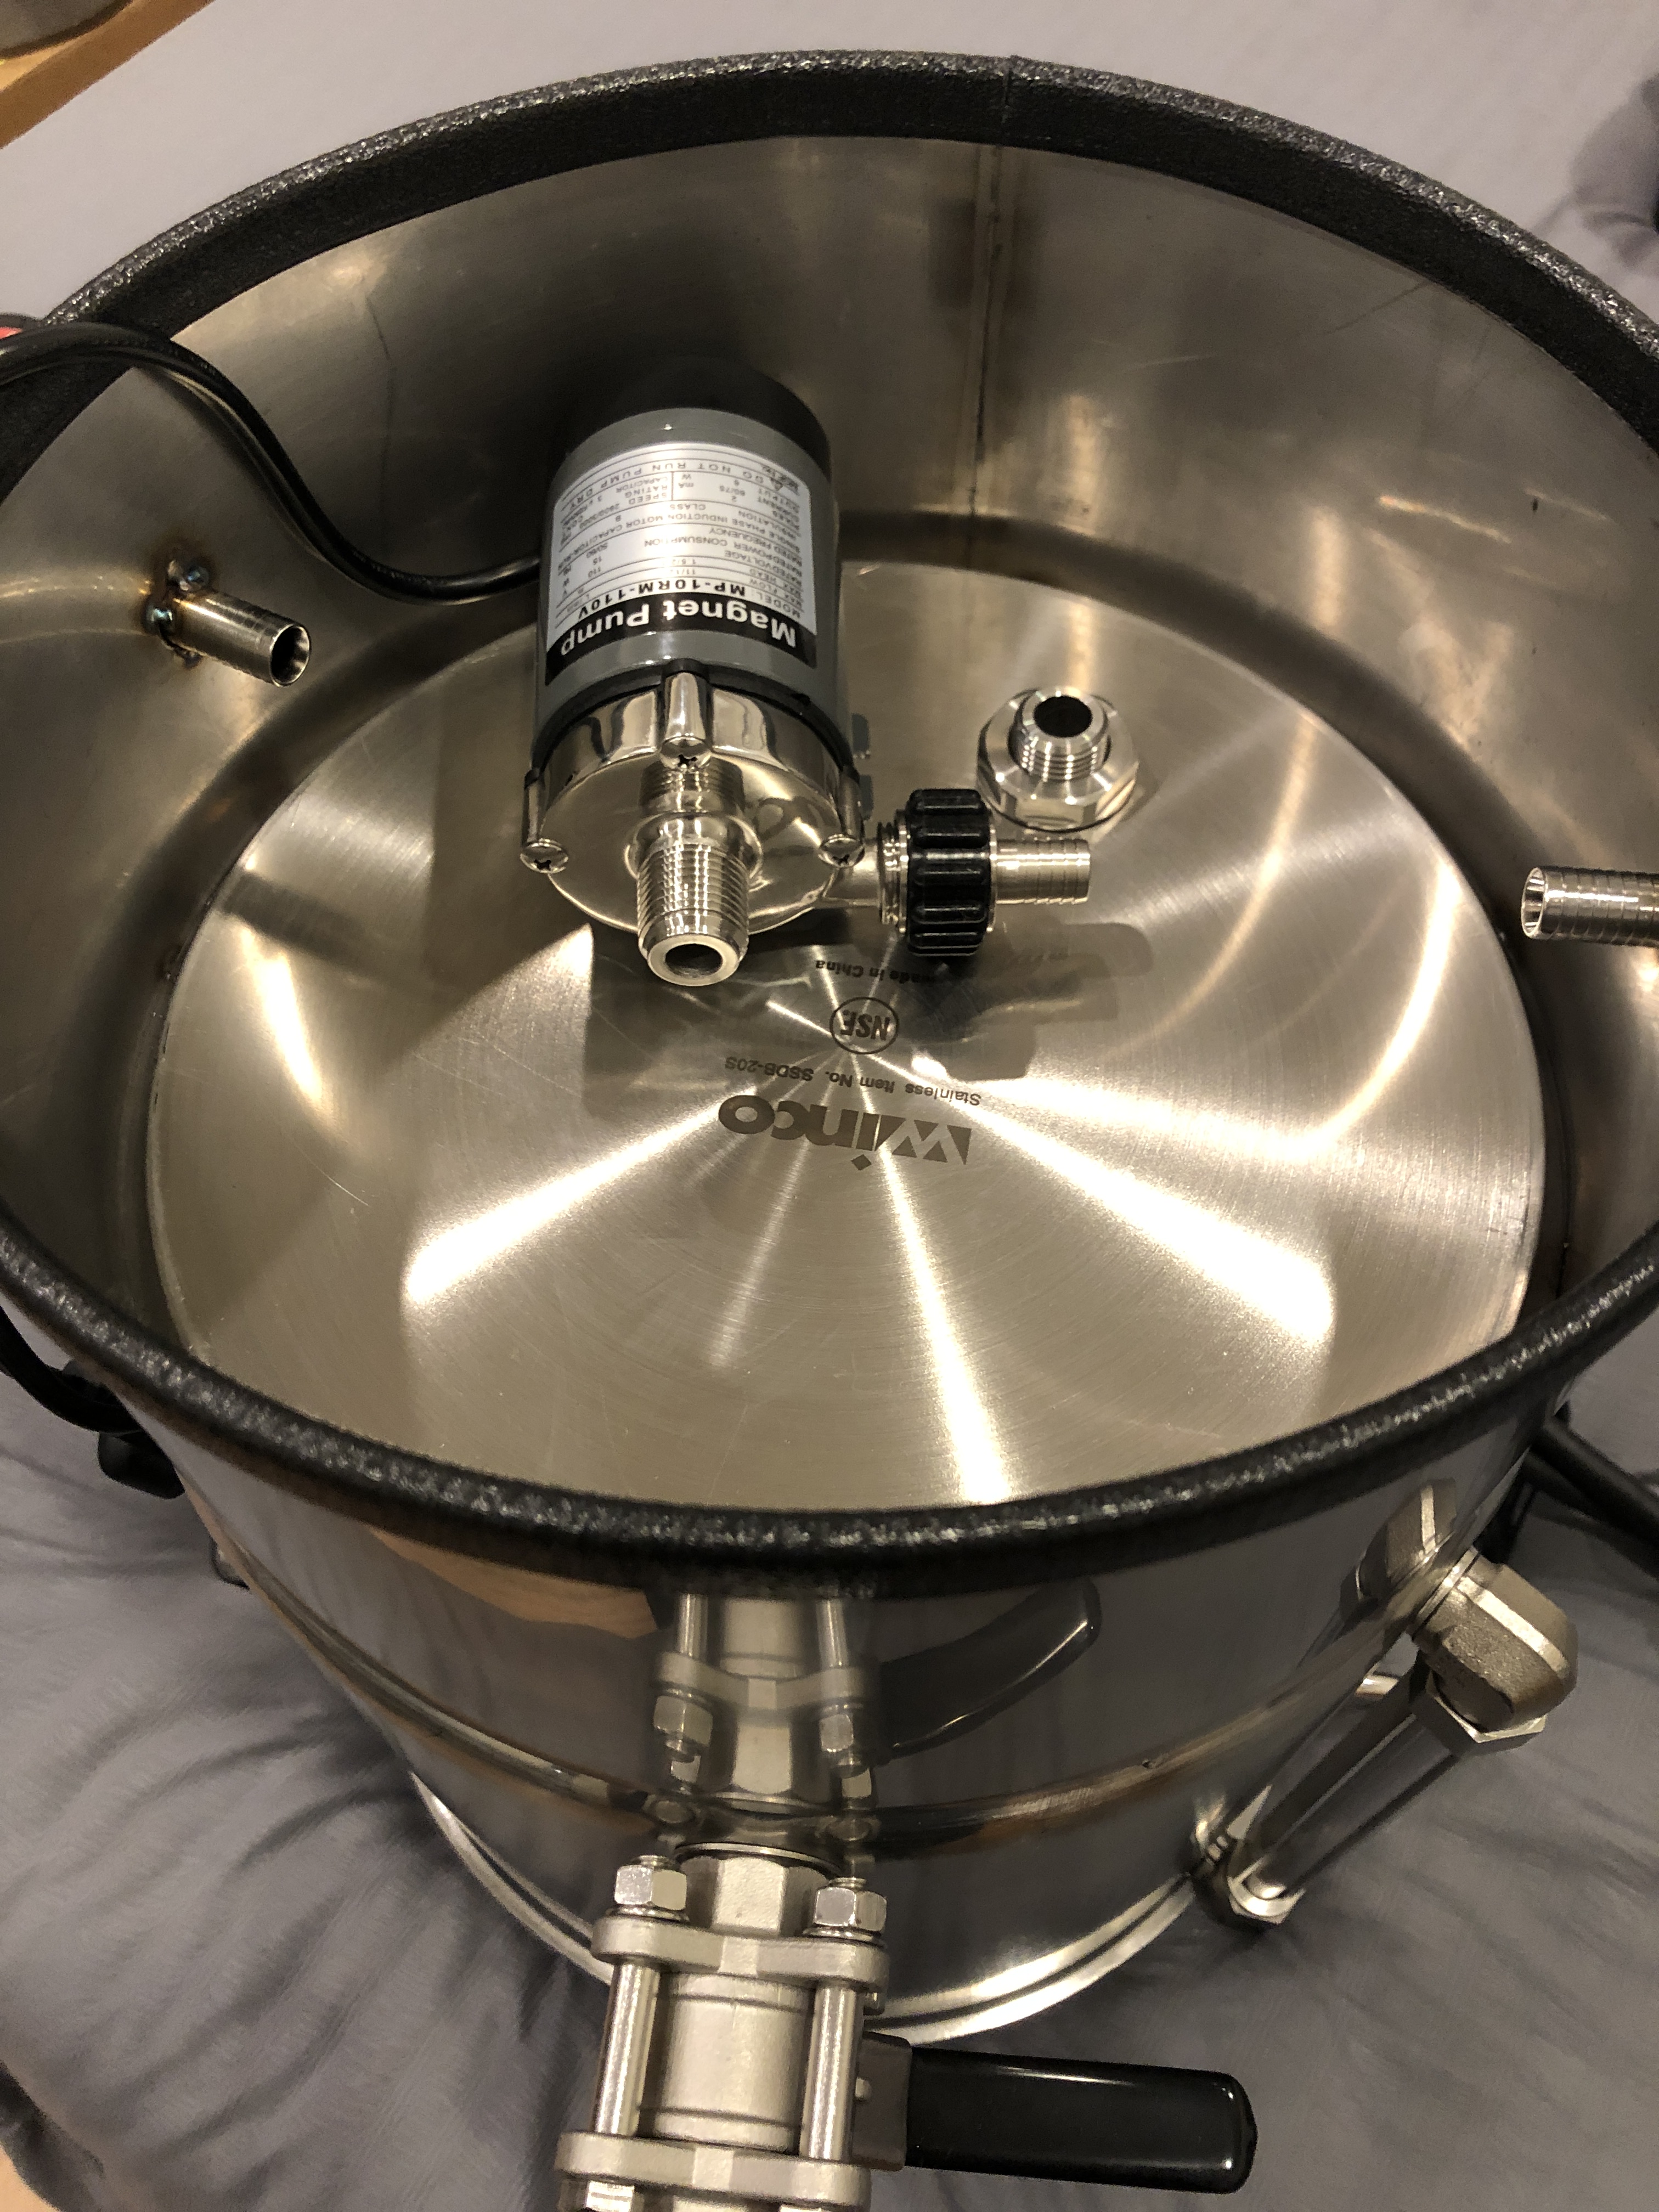
It has actually inspired me to make some changes to my small countertop system I brew on. While I have my brewing pump attached to my cart I wanted something more “all-in-one” for convenience in my small space. I found a nice small 120 volt brewing pump from AliExpress that very similar to the Anvil brewing pump but with a stainless steel head for durability. I had a stainless ring fabricated and welded to the bottom of the kettle to raise it up and to hide the pump and plumbing. I mounted the pump to the bottom of the kettle, the kettle’s triclad bottom was just thick enough to use very short screws to secure the pump without going through the bottom (nervous for a few minutes while drilling holes and tapping them). I installed a weldless bulkhead through the bottom of the kettle, from Brewhardware.com, to feed the pump. I then had a couple tri clamp hose barbs tack welded on the sides of the ring to attach my tri clamp sanitary diaphragm valves to. I am still looking for a three-way valve to mount through the support ring to direct the pump output. A few months ago I also installed a Blichmann whirlpool fitting in the kettle. The goal, with all this over engineering, is something similar to the Brewtools systems….

  • Compact all-in-one system.
  • Pump from bottom of kettle to recirculate during mash.
  • Pump from bottom of kettle to wort chiller and then back through whirlpool inlet.
  • Fewer, shorter hoses for less loss.
  • Flexibility for future growth or different brewing processes.
  • Clean in place capable.

For those that are checking out my site for the first time, yes I tend to over engineer stuff lol. I enjoy the challenge of making a high quality professional system on a small scale myself. Does it make better beer than a stockpot on the stove? Absolutely not but it does add some flexibility and convenience. Another driving factor for my posts is to inspire other home brew DIYers to try new things.

Stay tuned for more updates as I finish the system…will it ever be “finished” ha ha. Also kicking around the idea of doing podcasts and a Youtube channel. Stay safe everyone!

Cheers

Finally practical induction small batch brewing is here and it makes a great steak too!

I promised and here it is.

For many years I have looked at induction cooktops (hobs) for brewing but they all lacked one thing…accurate temperature control. Temperature modes measured the glass top beneath the kettle and not the contents of the kettle on the induction hob. Temperature control was haphazard at best…until now.

A few months ago I was doing a web search for induction beer brewing to see if anything had changed in the technology. After going through many search results I came across a websites blog entry about sous vide cooking and beer brewing. It was on a website belonging to Oliso. Oliso has been a manufacture of speciality irons for clothing and quilting. They recently delved into induction sous vide cooking. Now sous vide cooking requires accurate temperature control of a water bath for extended periods of time…hmm sounds a little like brewing. I started reading the blog entry and it was written by an Oliso staff member that was a home brewer and it detailed his one gallon batch brew day using the Oliso SmartHub and Top. I was intrigued and looked at the details about the SmartHub and Top induction sous vide cooker. Impressive, time and temperature control. Temperature control in one degree increments! It is based on a 120 volt 1800W induction hob so useable anywhere.

I quickly shot off an email to the company with questions about the appliance and explained my interest, background and advocacy in small batch brewing. The great folks at Oliso quickly emailed me back with answers and questions of their own about small batch brewing. A few email exchanges and we setup a phone call to discuss more. I was as excited about their interest in brewing with the SmartHub as they were. The culture at Oliso has been and is that of making products that are what their customers want and the SmartHub is the result of that. How many companies want to know what you want as opposed to those that like to tell you what you need. Well the people at Oliso offered to send me a unit to use, brew with and send them feedback. As you followers of my blog know I am not a big product reviewer/endorser but this was pretty exciting. They wanted my honest opinion about it for brewing. That was fair, they already had a great sous vide cooking system with great reviews.

What is the Oliso SmartHub + Top? Well the SmartHub is a 120 volt 1500 watt induction cooktop/hob. It has a large glass induction heating surface, touch controls and quiet cooling fan. It, in itself, is a quality induction hob but it’s the Top that sets it worlds apart from other induction hobs. The “Top” is an induction compatible stainless 12 quart sous vide vessel with glass lid and an internal temperature sensor. Yep, when sitting on top of the SmartHub it measures the temperature of the contents of the vessel. The “Top” comes with a sous vide bag rack which also keeps your brew bag off the bottom of the vessel. On the front is a series of LED lights to indicate heating.

Some folks are mashing there small batch brews with sous vide “sticks” and having good luck but there is the cleaning concerns, bags and grain getting sucked into the circulator pumps etc and then you still have to boil on the stove. The Oliso SmartHub doesn’t have a circulator pump and it does just fine without one and it adds to the simplicity of the product and to the BIAB process.

smart_hub_hero_20151119_copy (1)

It was time to test it and brew! I needed a BIAB bag so I ran to the hardware store to get a couple 5 gallon paint strainers. In a pinch they worked and with a little coaxing the elastic top of the strainer bag fit snuggly around the Oliso. There are several better brewing bag options out there but the paint strainer bags were quick to find and worked fine.

I did a simple single malt single hop beer with a grain bill of around 4 pounds for 1.25 gallon batch size. I started with tap water at 56 degrees and set the Oliso SmartHub to 154 degrees. It was very quiet during operation and took only 25 minutes to bring the strike water to 154 degrees. I mashed in and the temp dropped only 3 degrees so the unit quickly recovered to the set temperature. For the hour mash I stirred the mash every 15 minutes and checked the mash temp with a dial thermometer I knew to be accurate. Pleasantly surprised to see the temperature was spot on each time. During the hour long mash the Oliso only cycled heat on approximately six times with lid off. The heating cycle while in sous vide mode (enters that mode automatically when the Top is placed on the unit) is gentle pulsed on/off similar to a PID controlled heating element. When the mash was done, used timer to remind me, I pulled the bag of grains out and gave it a good squeeze to get as much of the liquid out as possible.

vlcsnap-2019-04-13-21h36m32s226

Next was boil time. The SmartHub restricts the max temp to 194 degrees in sous vide mode by design but it is easy to get around this by carefully lifting the Top up at the front and slipping a piece of paper under the front edge. This interrupts the electrical contacts of the Top and the SmartHub now thinks there is just a normal kettle on top. Right to full power mode to get to boil. It took approximately 20 minutes to reach a good rolling boil. I did heat with lid on to speed up the process and removed it when it started boiling. I was able to turn power down to about 80% and still maintained a nice boil for the hour. Hops for this recipe where added at 30 minutes into the boil (again used the timer feature to remind me). At the end of the boil it was time to cool. One could cover it and let sit to cool but I had a small 12.5 foot compact copper immersion chiller from Coldbreak Brewing that fit perfectly. I had it left over from stove top brewing. After the wort was cool I simply used a mini auto siphon to siphon the wort into my bucket fermenter. I hit my original gravity number and a little over 1.3 gallons into the fermenter. Brew day done in 3 hours including clean up. Cleaning was a piece of cake, a little dish soap and sponge and the SmartHub Top was clean.

I was impressed and using the SmartHub with the Top was easy and intuitive. After the brew day was done I sat down and went over my brew day observations and there were only two things I missed with the Oliso SmartHub and Top compared to my electric brew kettle. That was a drain, I’m spoiled having a drain valve on my kettle. Since it isn’t specifically designed for brewing I understand the drain omission and it really isn’t a big deal in my opinion. The second was a way to support the grain over the vessel to drain instead of holding it and/or squeezing. I emailed Oliso with my observations and suggestions and they immediately replied “we have a perforated steamer insert pan” that could support the grain bag to drain! I got one in the mail and on my next brew I used it and it was great. I just placed it on top of the sous vide Top and sat the grain bag in it to drain as I began heating it to boiling. It could be used to gently sparge the grains a little if you wanted to get a little more efficiency. Oh yeah you can use it for what it was made for and steam veggies or shellfish.

After the second brew day I put a couple steaks in ziplock bags and cooked them to perfection while working on this post. Used a fry pan on the SmartHub to add a little sear to the steaks and they turned out incredible and complemented the first beer made on the Oliso. If you haven’t tried the sous vide cooking process I highly recommend it! There are details and recipes all over the internet. Later, after getting the steamer insert, I steamed up some Pacific NW mussels and enjoyed them with the scotch ale I made with the Oliso…wow what a great pairing!

Check out the video from one of the brew days on my YouTube channel Small Space Brewer   Be sure and subscribe to my channel to get updated when I post new videos.

What do I think? Well I was given the Oliso for testing and evaluation purposes but the company wanted me to express my honest opinion. That being said I have to say, after several brew days with the Oliso SmartHub, temperature control for all-grain brewing is here and just so happens to be in a format that is perfect for small 1 to 1-1/2 gallon batches. You could even brew a 2 gallon batch of a lower gravity beer. For brewing it is almost a “right out of the box brewing appliance”, only a few things are needed that you may already have such as a bag, small wort chiller and auto siphon. The Oliso SmartHub has a small footprint so fits on any kitchen countertop. 120 volt design makes it usable anywhere including in an RV. Serves multiple purposes which is important for brewing in small spaces like my 270 square foot tiny apartment. I simply do not have have room for multiple appliances. The Oliso SmartHub gives me an induction cooktop for boiling, frying, searing, simmering, steaming, sous vide cooking and now brewing beer. It is priced at $499.99 which might seem a little high but I can attest to the quality and customer service. One also has to keep in mind that for $499.99 you are not getting an appliance with only one purpose, it replaces multiple appliances so it is a good deal. Just a sous vide heater stick will run you $100 or more. Currently on their website they are offering 20% off with a posted discount code. Check it out at www.oliso.com

Will I get rid of my electric brew kettle? Probably not as I made it specifically for my brewing style and the small space I brew in. I really like the Oliso and it’s versatility and it is definitely a very good solution for small batch brewers that also enjoy cooking. It’s also ideal for those of us with limited kitchen space. Would I buy one? Absolutely for the all the reasons above and I have been enjoying this one.

Oh yeah, I almost forgot the most important thing…the beer turned out great, simple and tasty.

Stay tuned as there may be more exciting news related to this.

Cheers!


Exciting stuff coming!

It’s been a busy winter with work and haven’t had much time to post but managed to brew some and still looking at new things for small batch brewing.

One thing I have experimented with and followed for many years is brewing with induction cooktops. While they work, they have had many short comings that prevented me from writing much about them. Lack of fine temperature control for mashing has been the biggest short coming but they do work fine for boiling the wort with only 120V power in smaller batches. For many years there has been little design changes in induction cooktops…until now! Well I found something new and I am fortunate and excited about working with the company to test it’s capabilities for home brewing, and in particular small batch brewing.

As we know, when living in a small space having a bunch of appliances isn’t practical and sometimes just not possible. How about an appliance that can serve many purposes in the kitchen including small batch brewing? What if it is smaller than most toaster ovens and can be plugged in anywhere? Yep!

Well I won’t say more at the risk of ruining the surprise but stay tuned. I will be doing a write up soon and post my experience. So for now this is a little teaser.

Something different will be that I will also be posting videos on my YouTube channel. I haven’t done much with YouTube before and excited to expand into that platform. You can find my channel by searching on YouTube for Small Space Brewer. I will also be upgrading WordPress to load video content soon.

Subscribe and check back for details. Cheers

Want to hear from you!

Working on a couple new posts but I was thinking, I have been sharing my small batch brewing ways for a few years. Well now I want to hear from you. Are you brewing in a small space? How small? What is your brewing setup? Comment below and if you have blog put in the link so I can share it.

Stay tuned for more.

Dispensing from small kegs in style

Many of us small batch brewers have decided to package our beers in something other than bottles. In a previous post I discussed different options and they all work but what about dispensing? Up till now we usually use a picnic tap with our corny kegs or just open a growler and pour a beer. Problems with that is picnic taps should have at least a 5 foot hose to offer resistance to provide a nice pour and opening a growler immediately starts to degrade the beer so you have to consume it quickly. Most us small batch brewers are also brewing/living in small spaces that don’t allow us the luxury of having a kegerator so we stick our small corny keg in our refrigerator and try to put the picnic tap and it’s hose somewhere out of the way.

DSC_9803

New from taproom.club

Now there is something new for us. I usually don’t review many products unless they are geared towards small batch brewing and I actually get to us one. Enter the tap taproom.club dispensing system. As you may know I have a PicoBrew Pico brewing appliance I use on occasion when I just want to brew something quick without much interaction in the process and have been happy with it. I follow a Facebook group for PicoBrew users and one day something popped up on the group…the taproom.club system. It was created by a Pico user in the Seattle area that wanted a better dispensing solution for the small kegs and even the 5L mini kegs that Pico users use. I immediately saw it as a great concept for, not only Pico users, but for small batch brewers. I had a couple online discussions with the taproom.club creator, Kechu Trevino, and was going to get one but he was selling them so quickly I kept missing the opportunity. After being notified that I was presenting at Homebrew Con I thought now is the time to get one. I got ahold of Kechu again and told him I would like to have something to take with to HomeBrew Con and he had a new production run and I was able to buy one. It drew a lot of attention at Homebrew Con but I didn’t really have a chance to use it because I was so busy with the preparation for the conference.

After the conference things slowed down and the vanilla porter I had fermenting was ready to keg so I tried it out.

One thing that impressed me was the flexibility of the system. It can dispense from small corny kegs (I use the 1.75 gallon ones), 5L mini kegs, keg style stainless steel growlers with screw on caps and even standard 64 oz glass growlers.

The biggest selling point to me was that it keeps everything together and sit nicely in the fridge. With the flow control beer faucet long lines aren’t required to get a nice pour. It has a built-in paintball tank CO2 regulator and uses 3.75 ounce paintball tanks (comes with two) that can be refilled at most sporting goods stores. The lines are connected to system with valved quick disconnects that allow you to switch lines easily without losing beer or CO2. Since they are connected with disconnects you can switch lines and use the included carbonating line. This connects the CO2 to the liquid out post on the corny keg and bubble the CO2 up through the beer to force carbonate it.

With different adapters you can dispense from 5L mini kegs (this accessory includes adapter cap for glass growlers), mini keg style growlers and glass growlers so the growler of craft beer you picked up from the local brewery or taproom will stay fresh and carbonated.

IMG_7257

5L Mini Keg and standard growler adapter.

I tried it out and was impressed with it’s simplicity and well thought out design. I used it first to force carb my porter, and then switching lines, to dispense it and using the flow control faucet got a nice pour. This all while taking up not much space in my fridge. Beer on tap and still room in the fridge for food.

They recently released a kit that allows you to attach the unit to the top of a bucket so you can place you small corny in the bucket with ice and take it with you to the park, camping or share with others where there isn’t a fridge. It is also available in two finishes now and they have a nice drip mat and line cleaning setup available.

If you need longer beer and gas lines for say a taller 2.5 gallon corny of if you want to set your keg to the side instead of having strapped in the back (I had to do this because my tiny fridge wasn’t as deep as a normal fridge), just contact them and they can help you.

DSC_0130

Excited to see new things made for us that brew small batches and I think this is a great product and made by a home brewer/entrepreneur.

Check it out at taproom.club

IMG_7258

Cheers!

Fermenting under pressure?

Pressure fermentation is something I have been doing for a little while now with impressive results. You may or may not have heard of this method, it is certainly not common place. While not common it has value, especially to those with limited space or resources for fermentation temperature control.

How does it work? Well a simplified description is normal fermentation but instead of using a vented fermenter that allows the excess build up of CO2 to be vented through an airlock or blowoff hose you use a sealed fermenter. Completely sealed? Nope, for safety’s sake we want to limit the pressure build up. Through research brewers have found that ideally you want to keep the pressure that occurs during fermentation to less than 14-15 psi or 1 Bar. Fermenting above those pressures reintroduces off flavors and slowed yeast production.

Why would you want to do it?

Advantages are being able to ferment at temperatures considerably warmer than you would normally ferment at without producing unwanted esters and fusel alcohol. This even allows you produce lager like beers at room temperatures. Another plus is you will end up with naturally carbonated beer at the end of fermentation. Reduced krausen which allows for less required head space in the fermenter.

One of the biggest advantages to us small space brewers is this method lessens the need for consistent temperature control. Water baths require frequent attention and a fermentation chamber requires space.

What do you need?

Well not much…

  1. A pressure capable fermenter. Please do not attempt in a glass carboy. There are a few pressure rated fermenters on the market that are rated to 15 psi, such as some new Unitanks but most are rather expensive and large for small batches. Some stainless conicals are advertised to be pressure transfer capable but that is not the same as pressure rated. A simpler solution is the standard corny keg, inexpensive and you probably already have one. Most are rated to at least 135 psi and have a built-in safety pressure relief valve. They are available in 5, 3, 2.5 and 1.75 gallon sizes. I have used the 1.75 gallon and 2.5 gallon sizes as they match my batch size, will fit in my refrigerator to cold crash or traditional lagering after fermentation as well as dispensing. This is a nice advantage to small batch brewing as you can pressure ferment at room temperature and place the keg in your refrigerator to cold crash. I have a couple corny kegs that I use for just for this and I have shortened the liquid dip tubes by about 3/4″ so after fermentation is complete you can pressure transfer off any trub or yeast sediment to another keg.
  2. An accurate and adjustable pressure relief  valve, commonly known as a spunding valve that attaches to the gas in post of the corny keg. Several online retailers sell them, below is the one I use from Williams Brewing.

spunding valve

This allows you to set and maintain the pressure you want to ferment at and keeps the existing pressure relief valve in the corny keg lid is a safety device. Adjusting the spunding valve is easiest done on an empty keg that you have charged with CO2 above the pressure you want to set it to. Charge the keg and remove the CO2 line, connect the spunding valve and adjust the relief valve to the pressure you want and it stops venting. I have had positive results at 5-8 psi as well as 12 psi. The later resulting in better carbonation of the finished beer.

If you are thinking about trying a lager you should give White Labs WLP925 High Pressure Lager Yeast a try. I have used it twice with very acceptable results. Both lagers I brewed finished in 10-12 days and were fermented at ambient room temperature of 68-70 degrees fahrenheit.

Remember to avoid pressures over 1 Bar (14.5 psi) as this can reduce yeast cell growth and can introduce increased acetaldehyde (green apple off flavor).

There is some research and testing by home brewers including side by side comparisons of beers fermenting normally and pressure fermented. So if you want to learn more or see what others’ experiences have been you can search the internet for pressure fermenting. Brulosophy did a great experiment a few years back.

If you don’t have room for a fermentation chamber or don’t want to hassle with changing frozen water bottles in a water bath you might want to consider pressure fermenting.

Recently a Pilsner was brewed using this method at temps around 77 degrees and it won a gold medal in an international beer competition. Not too shabby.

There is something new for this method and perfect for small batch brewers so stay tuned for more news!

Cheers

Small batch brewing and brewing in small spaces.

As promised I am posting my session from the 2018 AHA Conference. If you weren’t able to make it to Homebrew Con here is what I discussed.

Small batch brewing, the next big thing in home brewing. Could it be for you? Don’t let size and space restrictions prevent you from enjoying the hobby.

Reasons for going small…

  • Small space, big cities have a growing number of small apartments
  • Maybe you want to brew more often while not having a ton of beer sitting around.
  • Want to try experimental batches.
  • Refine your technique.
  • You’re the only person consuming the beer.
  • Just want to keep the hobby simple.
  • Get back to the basics.
  • Want to start home brewing without a big commitment in equipment?
  • You want to save a little time and money.
  • Escape brewing outside, much nicer to brew inside when it’s freezing outside.
  • Lifting during brewing is physically difficult.
  • Life is getting in the way of brewing.
  • You don’t need a reason, it’s just plain fun!

Equipment –

  • Kettle. For one gallon batch a 12 quart is great and you may already have one. A kettle 2 to 2-1/2 times the batch size for BIAB. I use a 5 gallon kettle and it works great for 1 to 2.5 gallon batches and even an average gravity 3 gallon batch.
  • Fermenter – For 1 gallon batches a 2 gallon bucket for primary and one gallon glass jug for secondary works great. 2 to 2-1/2 gallon you can use a 3-5 gallon carboy.
  • Smaller siphon if using 1 gallon glass jugs/2 gallon buckets as fermenters. There is a short version of the Auto Siphon that works great.
  • Small scale, you will be using small amounts of hops and dry yeast so chose a scale that measures in tenths of an ounce and grams.
  • If you are doing all-grain brewing using a standard mash tun arrangement then choose one sized smaller to help retain heat such as a 12-16 quart rectangular cooler or a 2-3 gallon beverage cooler. A BIAB mesh bag can be used in place of a false bottom or manifold arrangement.
  • Other items such as air locks, stoppers, hydrometers, tubing, cappers and caps etc are same as used for normal 5 gallon batches.

images

The brewing process –

The brewing process is basically the same whether you are brewing one gallon or 100 barrels. Extract, partial mash as well as all-grain can be done in small batches.

If you are completely new to home brewing there are many small batch equipment kits available from most of the major online home brewing retailers for 1 to 3 gallon batches. All contain the basic equipment you will need to begin brewing, some even have the kettle and beer bottles. This is where it is obvious that the industry has embraced the idea of small batch brewing, as little as 5 years ago there were few if any small batch equipment or ingredient kits available.

Already brewing? Most of your existing equipment can be used.

Small batch process considerations –

Volumes…

  • Calculate boil off rate of your kettle! This will allow you to get the amount of wort in the fermenter you want. Don’t boil too vigorously, you are starting with a small volume to begin with, a nice rolling boil is fine. If you haven’t calculated your boil off rate before, fill the kettle you will be using for brewing with two gallons of water and bring it to a nice rolling boil and boil for an hour. Let it cool and measure how much is left. The difference between the beginning and ending amount is your approximate boil off rate. Use that for calculating your pre boil amount. Double check it for a couple brew days to get an accurate rate.
  • Trub amounts will vary from beer to beer and when using different yeasts with different levels of attenuation but taking notes every once and awhile will give you a good idea. Err on the side of more than less, worst thing that will happen is you have an extra beer or two out of the
  • Keep notes on how much beer goes to bottles/keg for a few batches so you know how much trub to account for. Trub amounts will vary from beer to beer and when using different yeasts with different levels of attenuation/floculation but taking notes every once and awhile will give you a good idea. Err on the side of more than less, worst thing that will happen is you have an extra beer or two.
  • Recipe scaling. 2-1/2 gallon batch size is simple since you can just half everything in a 5 gallon recipe. One gallon batch you just divide ingredients in a 5 gallon recipe by 5. This will get you very close to what the original 5 gallon recipe was. Brewing software such as Beersmith will do the math for you.
  • Double check your units of measure! Home brew shops use different scales so if your recipe calls for .4 pounds of a malt make sure their scale is set correctly. Couple ounce error can be significant in a small batch especially with darker roasted grains. Same goes for hops.
  • Remember to scale down the yeast also, one can go really in depth in this area but generally speaking 2-3 grams of dry yeast per gallon is acceptable and will get you close to the recommended 1 million cells per milliliter of wort. For liquid yeast, I directly pitch a half packet of Wyeast per gallon and a whole pack for 2-3 gallon batches. White Labs recommends a whole vial for a 1 to 3 gallon batch especially for a big beer and a starter isn’t necessary and I have found that to work nicely. Having the chance to speak directly to the yeast companies about this at Homebrew Con was great and reassuring. Mr Malty’s Yeast Pitching calculator is also a great tool.
  • Testing specific gravity – Typically home brewers have used a hydrometer to test original and final specific gravity to monitor mash efficiency, fermentation process etc. Problem is takes precious beer to do this. Simplest thing is to just skip taking readings and let the beer ferment for 14 days. Refractometer. Uses a much small smaller sample size. Drops instead of ounces.Testing the standard method usually wastes about the equivalent amount of a bottle worth since you do not return the beer sample to the fermenter to prevent infection. Well when brewing a one gallon batch that much wasted beer hurts.Not testing …well if you are a home brewer with any experience that may be hard to do as we want to know what’s happening with our beer. One solution is to use a refractometer, which can measure the specific gravity with only a couple drops of wort or beer. The only problem is a refractometer doesn’t really work correctly when alcohol is present in fermented beer. If you record the original gravity and then get a final gravity reading there are several online calculators to give you a fairly accurate indication of alcohol by volume of your finished beer. A refractometer can still indicate if there is a change in specific gravity to indicate whether or not there is still fermentation activity. If you get the same reading three days in a row then typically it has finished. Personally after brewing so many batches and knowing my practices yield a consistent mash efficiency I am comfortable with just taking an original gravity reading to confirm my practices and then let it ferment for 14 days for ales. Recipe software is fairly accurate in predicting final gravity and ABV. At this point in my home brewing I am a firm believer in relaxing, not worrying and having a home brew. My golf game also improved and was more fun when I stopped keeping score.
  • Chilling your wort – With small batches it is easy to chill your wort to pitching temperatures by placing boil kettle in a cold water bath (kitchen sink) or ice bath. Small immersion wort chillers are available from several online retailers. My favorite is the compact immersion chiller from Coldbreak Brewing Equipment for $40. You can also make your own.

On to brewing…

Heating –

Stovetop or stand alone electric? Both are easy with smaller batches as less energy is required to bring 1-3 gallons to a boil. Stove top is the easiest and requires no special equipment. Where a stove top wasn’t a great option for 5+ gallon batches it works fine for small batches.

Electric systems – There are a few options for small batch stand alone electric BIAB systems including building your own.

Induction cooktops are a good option for small batches. 120V is great as it is capable of boiling small batches and is available in every home.

Brewing methods –

BIAB and traditional 3 vessel all-grain brewing methods are doable. BIAB being the easiest and requires the least amount of equipment and still you still get great results. All you need is a mesh bag and your kettle.

You can maintain mash temps during BIAB in a small kettle by covering the kettle with blanket or placing it in warm oven (150 degrees). Smaller vessels than usual for HLT, Mash Tun and Boil kettle. Small 3 gallon beverage cooler with BIAB bag or a small rectangular cooler with slotted manifold. Batch sparging also makes the process easier.

With a 3 vessel (HLT, Mash Tun and Boil Kettle) you will have to get creative but I have done the HLT on top of the fridge draining into the mash tun on the counter that drains into the boil kettle on a chair.

All-in-one systems –

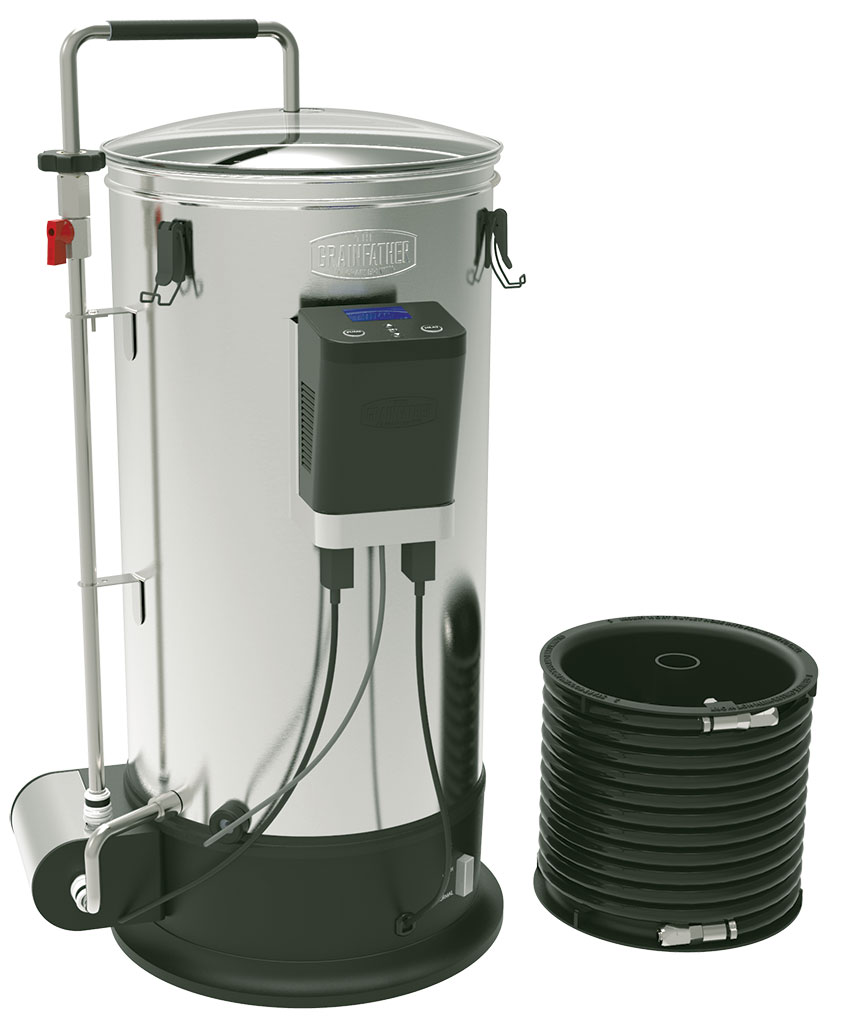
All-in-one brewing appliances such as the Grainfather, Robobrew and the Mash and Boil have small batch capibilitues and don’t take up a ton of space, operate on 120V and can be stored in a closet when not in use.
J09

Bottling or kegging –

Bottling is a whole a lot less work when you are only bottling about 9-10 12 oz bottles with a one gallon batch. Less space is needed to have multiple batches conditioning or aging. Carbonating drops make it even easier. Swing top bottles eliminate having to have a capper and caps.

Kegging…yes you can!

Kegging options –

Using stainless steel growlers and available CO2 dispensing options you can keg as little as a half gallon.

Tradition corny kegs are available as small as 1.75 gallons as well as 2.5 and 3 gallon sizes. Kegs that small can be kept in your normal refrigerator, eliminating the need for a separate kegerator and saving space.

Personally I like corny kegs since the connections are all standard in home brewing and parts are easy to source.

Below on the left is a sneak peek at something new for small batch brewers that want to keg and easily dispense. Check it out here http://www.taproom.club

One the right is my refrigerator with a 1.75 gallon keg.


Now on to small space brewing!

Considerations –

Storage…

Biggest obstacle is storage! What can you do? Well here is what I have found to work.

Storage containers, nest smaller items in larger items, under-bed storage containers, top of closets, cabinet above the refrigerator.

An inexpensive new or used Armoire can provide attractive storage for all your brewing items that can fit in any decor.

Rolling kitchen island can do double duty, providing brewing storage as well as giving you additional kitchen work space and storage. I purchased a 24″ x 36″ stainless steel prep table that stores some of my brewing items and gives more counter space to brew, eat, prepare meals and work on my computer.

You can even store and hide your brewing gear in storage ottomans for your living room.

Collapsible items such as buckets and dish pans can be used for sanitizing, cleaning and don’t take up any space. These are available online through places such as Amazon.

A lot of my gear is in storage totes under my bed since I live in a tiny studio. In previous posts you may have see my brewing cart and made a nice cover for it. Use items that serve double duty such as your brew kettle can become a bottling bucket with a racking cane or if you have a drain valve installed.

Ventilation…

Ventilation is still important with small batches, especially in small spaces and if the room is cool. If you have a range hood that vents outside that would be more than adequate. If you don’t have a range hood but you have a window that opens in the kitchen or brewing space, a box fan can move a lot of air and accompanying humidity out of your space.

Fermentation space and temperature control…

  • Use stick-on strip thermometers on your fermenters to monitor temps.
  • Closets are a great space since they are dark, closed of from the rest of the home and do not have windows or heating/cooling vents so temperatures are more stable.
  • A digital thermometer with min/max feature can tell you the average temps of an area you might be considering to ferment in.
  • A small dorm/apartment refrigerator can become a temperature controlled fermentation chamber.
  • A simpler solution is a basic water bath. Place your fermenter in a container of water and use frozen water bottles to keep it cool or an aquarium heater in the water bath to keep it warm if needed. Check temp often.

water bath.png

Pressure fermenting…

Fermenting under pressure. Pressure fermenting is gaining popularity as it allows for fermenting at a wide temperature range with less risk of having to worry about the production of off flavors such as fusel alcohol when fermenting too warm. Not a new practice but more people are trying it. A suitable pressure capable vessel is needed such as a corny keg. PicoBrew sells a replacement pressure relief for corny kegs that vents at a lower pressure to provide a safer fermentation process while using a corny keg. Or you can use a spunding valve. Ideally you want to ferment at pressures less than 14 psi. Above 14 psi yeast production can slow or stop and off flavors can begin to develop.

I have done several batches this way using a corny keg and spunding valve with no real temperature control and did not detect any off flavors. Kind of a poor man’s unitank.

Williams Warn from down under has their Brewkeg10 that allows for pressure fermenting batches up to 2.6 gallons as well as yeast harvesting, trub removal and dispensing from the same vessel. It is available in the US and has standard ball lock connections. Another example of manufactures embracing the small batch brewing popularity.

BrewKeg10

This process will also carbonate your beer during the fermentation process.

Pros and cons of small batch brewing…

Pros –

  • More and more home brew shops and online retailers are carrying small batch ingredient and equipment kits.
  • There are even many purpose built pieces of small batch brewing equipment.
  • Heating times to reach your strike water temperature and bringing the wort to a boil are shorter with a smaller quantity of liquid.
  • Less/easier cleanup.

Cons –

Well you are making a smaller amount of beer so you may have to brew more. Wait, is that really a con?

So other than it taking almost as long to brew a one gallon batch as a ten gallon one there really isn’t a major downside to brewing on a small scale.

Well that was the presentation and I hoped I was able to give you some food for thought. Above all I hope you realize that wanting to go small isn’t a limitation but more of a method to making brewing work for you.

I will be posting more about the topic soon.

Cheers
 

AHA Homebrew Con 2018

Well I have to apologize again for lack of posts but a lot has been going on. Moved to Seattle for a new job, moved into a 270 sq ft studio micro apartment (literally brewing in a small space!) and probably the most exciting…

If you are thinking about or actually going to the 2018 AHA Homebrew Con in June I will be presenting a seminar on small batch brewing and brewing in small spaces! Very excited to see an interest in the topic to be chosen to speak. If you will be there come to the seminar and say hi.

Homebrew Con will be June 28-30 in Portland Oregon. Registration is open now on the AHA website. There will be a lot of knowledgable presenters and great stuff to see.

Now back to my other life happenings…yep I am living in a 270 sq ft studio micro apartment. Guess you could call it a “tiny house”. Excited to begin brewing again and sharing the experience with everyone. Some of my brewing gear just won’t fit in my new place (sadly my kegerator is in storage) but there are still ways to make home brewing in such a small space work.

New things for us small batch brewers

Well after much uncertainty I have finally made it back to the Pacific Northwest and there is much beer and it is good! My brewing stuff is currently boxed up for now but I’m always looking at all that is happening with brewing and in particular, small batch brewing. It is exciting to see there is a continued focus on small batch brewing and some new things out there us. One company, Synek, is a producer of craft beer dispensers that allow you to keep craft beer, that you picked up in a growler, fresh and ready to dispense from their countertop chiller. It is a pretty robust and quality piece of equipment that uses Perlick faucets and paintball CO2 tanks with a real pressure regulator. It will hold two 64oz standard growlers (one on tap and one chilling) or one of their one gallon cartridges. I personally love the fact they created an adapter for the standard growlers because that is the industry standard.

They have been around for sometime but now they are diving into the home brewing side. They have tips on how to use their Synek dispenser for home brewed beer and that is a nice way to have your home brew on tap without the space commitment required by a kegerator. Little spot on your countertop and fresh draft beer (brewed by you or from your favorite brewery) available on tap. And you get some room back in your fridge for food…guess food is a necessity and a lot of it goes with beer.  One note is that I’m going to be trying PET plastic 64oz growlers (available from several online sources) for bottle conditioning in as I feel they are safer than glass. Many people bottle successfully in glass growlers but I’m still a little leary. Stay tuned for my first hand experience with those.

Now this isn’t a advertisement for Synek, I have their dispenser and I think it has merit for the small space/batch brewer and it is a quality piece of equipment, they are going one step further. Home brewing ingredient kits for one gallon batches. These will be available in December sometime and additional variations added as they are available. Several of the first recipes will be recipes I believe they have crafted and here is the exciting part…some that are real craft brewery recipes! They are partnering with craft breweries to bring some of their recipes to homebrewers. They will also have how-to videos, tips and tricks posted and they even have a nice one gallon hardware kit that actually has everything you need. Check them out here Synek

As soon as their one gallon recipe kits are shipping I will be giving one a try to get something brewing around here and report back after it’s ready to drink. Watch for that post soon.

Have any of you found a different way to dispense your home brew than the traditional bottling or corny kegs? Leave a comment below.

Cheers